Monday, September 26, 2011

I Love Fall!

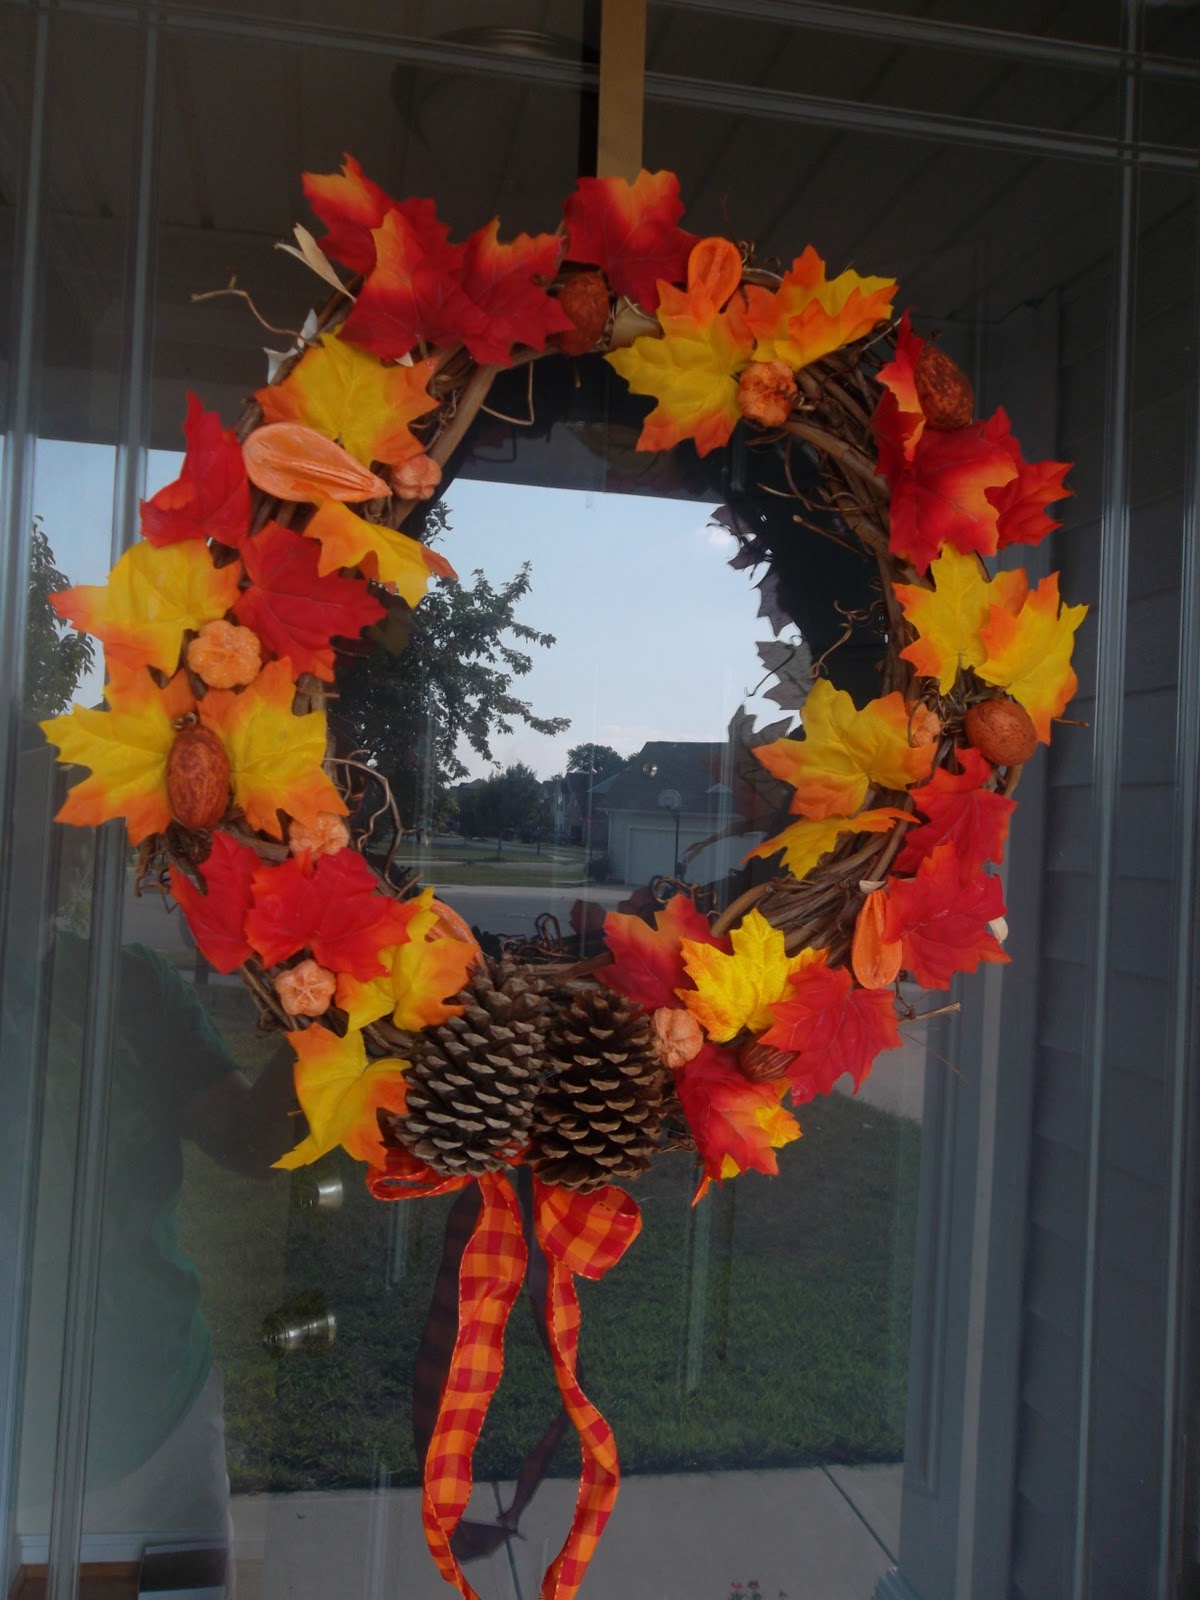
I am so in love with fall!  I love the weather, the colors, the fall holidays... everything!  So over the past couple of weeks I have been getting ready for fall with some crafts.  This wreath I actually made last year, but I love it so much I thought I'd post again!  In total I think it probably cost me about $10, if that.  The wreath and the garland leaves were on sale at Michael's for pretty cheap.  I don't have pics to do a step-by-step "here's how I did it," but it was very easy.  I took the leaves off of a garland (literally, I popped them off), took pine cones from my Mom's yard, ribbon from my left-over scrap box, and the potpourri from a storage box.  Then I got out my hot glue gun and got busy.  I love the colors!


This next one was even easier.  I got a couple of bushes of fall flowers on sale at Michael's (they had their big fall sale last week....can you tell???), grabbed a cornucopia basket that someone gave me, put the flowers in, and hung it with wire.  Ok, so I didn't actually have wire.  That is a straightened coat hanger.

And here is how the two look together on my front porch:


Tuesday, September 13, 2011

I want to make these..

These are so cute... Thanks Shabby In Suburbia!  They look just like the ones that take 3 days to make with resin (on the Hobby Lobby Inspirations page), but they're made with glass tiles and scrapbooking paper.  Easy!  (The link is for the tutorial.)

Tuesday, August 16, 2011

I heart Hobby Lobby

I found a new reason to love Hobby Lobby.  Their Porject Inspiration pages!  They have "Inspirational Sets" which basically just show you a bunch of ideas using one of their products, but they are very cute ideas!  My favorite, though, are their "Project Sheets."  Everything on there comes in PDF format (it basically looks like they scanned in their free pamphlets) that can easily be printed, and these Project Sheets are actually instructions to the crafts!  I want to make one of these, these (at Christmas time) and some of these (much cuter than the ones I made the other day)!
(And here's a pic, just to spark your intereste!)

Va va votive!

I made a Tie!

So, I have been searching and searching for a necktie for Evan to wear to church.  We had one that we got from the church bookstore, but it quickly got torn up and untied.  The ones at the department stores are expensive and either too long or too short.  So I started looking for patterns.  I found some fabric months ago in the discount bin at Hobby Lobby (I think it was about $3 for almost a yard) that I had been dying to make a tie out of, but I was not willing to pay $15 for a pattern.  That's almost the same as just buying a tie.  So the other day (again, after I finally got my craft area clean) I searched online for a pattern and tutorial that looked do-able.  I found this post on The Purl Bee blog (which is fabulous!) and thought it looked easy and fast, and it was!  I think I worked on this for 4 hours total (including trying to teach myself how to do a slip stitch and then doing it veeeeeeerrrrrry slowly and stopping to check the blog every 5 minutes to make sure I was doing the right thing), start-to-finish.  I want to try another one for Christian (which you can do by reducing the size when you print it apparently...duh!), and I'm sure it will go much faster now that I know what I'm doing.  It was really fun, and I love the result!

Wasn't sure how to tie it...

My little model... in full Batman attire, naturally

I looked up how to tie it real quick, but I'm not very good!  :)

A New Project!

So I FINALLY have my craft area re-organized, and I love going into the room now.  It has totally renewed my crafting spirit!  Now, I don't have a lot of funds right now (my piano lessons haven't started back up yet), so I'm mostly crafting with just what I have laying around.  Here's what I did the other day: votive holders!


It's not the most magnificent thing I've ever made, but I think they're pretty cute.  I used some empty cheese dip jars (my hubby's favorite), took off the labels, and Mod Podge'd on tissue paper.  I wanted to try a couple of different things for embellishments, so I wrapped a scrap of lace around one and a simple ribbon around the other.  I think the music one will look cute on my piano.  :)  I like the blue ribbon on the lace--it gives it a more casual accent (as opposed to, say, pearls, which I also considered putting on), and gives it a little extra color.  It only took m about an hour to make both, including mod podge drying time, and there are sooooo many things you could put on them!  I just used what I had on hand, but you could do different papers, ribbons, charms, jewels...even feathers and paint!  I can't wait to get more supplies so I can try different things!
Tuesday, May 10, 2011

Mother's Day Gifts

Here are a couple of projects Evan helped me work on for his grandmothers for Mother's Day.  For my mom he helped me paint a birdhouse that he picked out from Michael's.  He is quite the good painter.  :)  When the paint was dry I cut the shapes out on my Cricut and decoupage'd them on to the sides of the birdhoue.  Here's what we got...


Next we made letters for Evan's other grandmother, whom he calls MiMi.  The letters we found at Michael's came with a base that held up to 4 letters, so it worked out perfectly!  I wish I had had matching purple paint to paint the base, but I still think it turned out pretty cute.  We traced the letters onto paper, cut out the shapes, Mod Podge'd them on, then cut out long strips to wrap around the outside and inside edges.  Super easy!  Gotta love Mod Podge!

Saturday, May 7, 2011

Mod Podge

I think I'm addicted to decoupage.  Here is my latest project.  It's just a wooden serving tray from Michael's, and I painted it white and Mod Podge'd cute paper onto the tray part.  Very easy, very fast, and cute!  It could be done in sooooo many different ways, with any colors or paper.  Love it!