 |
| They are both double-sided--red on one side, blue on the other. Ignore the lack or ironing! |
Tuesday, November 29, 2011
Playing Santa's Elf
So several weeks ago I had the idea to make super hero capes for the boys for Christmas. I happened to find some nice cute and red fabric at JoAnn's the other day, so I thought I would give it a try. These capes were SO easy! Here is the tutorial I followed, courtesy of How Does She?. It was seriously super easy to follow. The only thing I have left to do is add the hero logos. Any suggestions on how best to do that are welcome! :)
And again... these are Christmas presents, so shhhhh! Don't mention it to Evan! ;)
I made a dress for my baby!
Hooray! I finally got to make something for my little-one-to-be! I made it without a pattern, thought I did get some inspiration from several blogs (and Pinterest). I made it using a onesie and a scrap of cute little pink flowered fabric. Now. The band around the waist is not straight and I am aware of it. I took the seam out and sewed it again, and it is still crooked. Also, I am going to cover the stitching around the band with some ribbon or something, That being said, I think it's not too bad for a first try at making something completely on my own!
A lot of onesie dresses cut off the bottom part of the onesie, but I left mine whole so that I could still snap it around her diaper. That way it won't ride up when she wiggling around or we pick her up. I just hemmed a rectangle of fabric, gathered it, sewed the side edges together, then sewed the skirt onto the onesie. Then I sewed a purple tube of fabric and sewed it right over top of the ruffle (mostly to hide the raw edge of the ruffle). I thought about doing a whole tutorial, but didn't know if anyone would be interested. If you want more detail, let me know. :)
 |
| Please ignore the dingy onesie. This was a trial run with one of the boys' old onesies! |
A lot of onesie dresses cut off the bottom part of the onesie, but I left mine whole so that I could still snap it around her diaper. That way it won't ride up when she wiggling around or we pick her up. I just hemmed a rectangle of fabric, gathered it, sewed the side edges together, then sewed the skirt onto the onesie. Then I sewed a purple tube of fabric and sewed it right over top of the ruffle (mostly to hide the raw edge of the ruffle). I thought about doing a whole tutorial, but didn't know if anyone would be interested. If you want more detail, let me know. :)
Tuesday, November 1, 2011
Reusable "zip-lock" bags
So I've seen several different versions of these around, but most of what I've seen has sounded pretty complicated (sewing vinyl to the inside, etc), but this woman on the I Can Teach My Child blog is brilliant. She guest-posted (is that a word??) this tutorial on Oopsie Dasie, and it is fabulous. She used a vinyl tablecloth to make her baggies. You know, the kind you use on a picnic table that has soft cotton on the back? The tutorial is very easy to follow, and the tablecloth only cost me about $3. No more wasting money on plastic bags for me!

My first bag took about 45 minutes, mostly because I had to keep stopping and starting. (The second one only took 20 minutes!) I would suggest using a more heavy-duty needle than you would normally use, and be prepared to sew more slowly. The vinyl gets very thick towards the end and I nearly broke my size 14 needle. A 16 worked just fine.
The second one I made a little bit wider (I believe her tutorial says to make it 7.5" wide, but I went up to 8" for the second one.) It only took about 20 minutes to make start-to-finish. These really are very simple!

These are the perfect size for snacks and (hopefully) sandwiches, they are washable, and they are somewhat insulated with all the felt on the back of the table cloth. Plus, the bags only used about 1/100th of the oblong tablecloth (Ok, I just made that percentage up), so I could make a ton of these bags and still have enough table cloth left to make some bibs. Hmmm... tomorrow's project??

My first bag took about 45 minutes, mostly because I had to keep stopping and starting. (The second one only took 20 minutes!) I would suggest using a more heavy-duty needle than you would normally use, and be prepared to sew more slowly. The vinyl gets very thick towards the end and I nearly broke my size 14 needle. A 16 worked just fine.
 |
| In her last step she has you put the velcro together and stitch up the sides, so that the stitching is on the outside. I did mine with the stitching on the inside. Just fold the bag in half with the Velcro on the outside, sew up the sides, then turn it right-side-out. .....it'll make more sense when you read her instructions. |

 |
| See the difference in the width? |
Christmas presents.. shhh!
So I have started making Christmas presents--yay! I will post one or two depending on who they're for. If we have your kid's name and you want to be surprised, let me know and I won't post! This first one is a scripture tote made from a place mat. I got just a neutral-colored mat that cost about $2 at WM. I read several tutorials to get the basic idea of how to do it, then I just sort of worked it out. Here are a couple of the in-process pics, then the finished result.
 |
| Supplies: place mat, ribbon, sewing supplies |
 |
| Step one: sew on handles. (This was my first ever handle, so excuse the un-even box!). Measure in from the sides to get them evenly spaced |
 |
| Pin and sew down any ribbon, lace, fabric or embellishment you want. (It will cover the stitches from the handles) |
 |
| Now put the right sides together and sew up the sides. |
 |
| Flatten out each corner into a triangle and sew straight across. I followed tutorials and sewed it at two inches, but might do it at about 1 1/2 inches next time. 2" made a very wide bag. |
 |
| Trim corners, turn right-side-out and add a bow or flower or whatever you want! |
 |
| Ta-Da! |
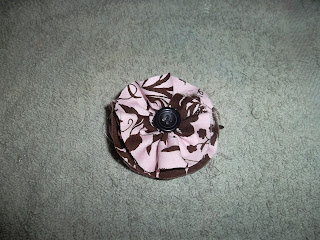
Hey, I made this!
I made this a while back, and I just forgot to post it. Here is the tutorial I used. It only took about 20 minutes. After I got it all wrapped and sewn together, I trimmed the top layer a little so it would give it more of a layered look. I think it turned out pretty cute. Next time I'll make it smaller though. :)

Subscribe to:
Posts (Atom)