Monday, August 30, 2010

So Much to Store, So Little Space!

This seems to be a common problem among...well...everyone.  I don't think I've ever heard anyone say, "I just have too much space and not enough stuff to fill it up."  (If you know someone like that, please have them share their secrets with me!)  One of my biggest challenges is keeping my craft stuff organized.  I loooooove crafts of all kinds.  I have scrapbooking stuff, card-making stuff, Cricut accessories, kid-friendly items, and photos galore!  After a year or so of moving and moving again and not really having a place for my crafts to call home, I have finally gotten everything organized and in place.  (My motto, afterall, is "A place for everything.")  Here are some "tools" that I find indispensable when it comes to getting project areas organized:
Drawers work great for my Cricut Cartidges, glue, stamps, and large accessories
Boxes for kids' crafts, plus mail organizers for paper
My scrapbooking bag, which now mainly holds paper!
Boxes for photos and small bins for scissors, markers and pens

Sunday, August 29, 2010

Cricut Card-making!

This past week we celebrated two birthdays, and my son looooves to help me make birthday cards on our "cutter" (i.e. the Cricut). This first one is the card we made for my Dad.

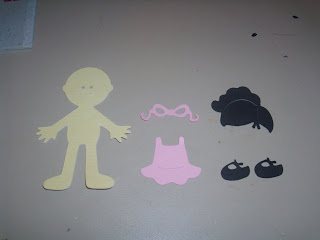
My little helper picked out the paper and the dinosaur, and he helped me glue it all together. We used the "Stretch Your Imagination" cartridge, which has some super cute designs, and a built-in function for card-making. We used the striped paper for the card foundation, then we used brown paper and green frames for the front. Then we used the "Paper Dolls Dress-up "cartridge to cut out the dinosaur. We had so much fun making it that we decided to make one for my brother's girlfriend too! We made hers with the Paper Dolls Dress-up cartridge as well, but we actually made a little character for this card. Here's how they start:
Then we glue it all together, enhance the features a little, and here's how it turns out:
Then we cut out the card base and an envelope using the Plantin School Book cartridge, glued it all together, and look how cute it turned out!

Friday, August 27, 2010

Kitchen Tips Courtesy of Martha

So, I love Martha. I am somewhat envious of her talent to decorate and organize. There is a great video of her on the Today Show (heart) sharing some tips for a beautiful and functional kitchen. I love when life is simplified.

Monday, August 23, 2010

Leaf Collages

The weather here was absolutely beautiful today, so we decided to go outside for a picnic, then ended up collecting a bag full of leaves! And what do we do with bags full of leaves? Make collages of course!! Today we decided to make "trees" from construction paper and our leaves. Here's what we used:

First, we cut "trunks" out of brown construction paper and glued them onto some thicker paper. then we separated and grouped the leaves, and we used scissors to cut some of them off of their stems.

I let my little artist decorate his yellow paper, then we put down some glue and he started going to town with the leaves! (If you cut off all of the stem it will stick to the paper better!) I think they turned out pretty cute. I love the variety of leaves we were able to find in our yard. I can't wait to see what kinds of projects we can get into this fall!!

Thursday, August 19, 2010

Some Things I Love

Over the last couple of days I have been thinking a lot about children's crafts and art projects, mostly because we have been a little bit bored! My son loves doing art projects, and here are a few products that we love to use!
ColorWonder Finger paint! Clear finger paint that shows up only on the ColorWonder paper. I know the ColorWonder stuff can be a little pricey, but I looooove that it's clear and doesn't make a huge mess! As you can see, the results are beautiful! :)
These cool markers for beginning artists. They fit just right in a small hand, and when they're done coloring the marker sets itself upright and none of the color leaks out.
Crayola.com is an awesome website. It of course showcases all of their products, but it has some pretty awesome activities, coloring pages, and craft ideas. Check it out!
OK. So it seems like I'm a little obsessed with Crayola. What can I say? We Love Art!!

Monday, August 16, 2010

More on Starting Simple

OK. Let's say you want to organize your entire house. Where do you begin?? Well, the first thing to do is to abandon the thought that you will be able to get everything done in one day. Dismiss thoughts of getting it all done in one weekend. And if you are procrastinating because you're "waiting until you have time," you will probably never start! Organizing takes time, but that's OK! You don't have to do everything at once. Don't get overwhelmed. Start with something small and do what you can when you can. Take 10 minutes before Cupcake Wars comes on to clean out your kitchen junk drawer. Then instead of dreading having to sift through every time you need to find something, you'll open the drawer and be proud of how organized it is. Doing the small things first (like the junk drawer, the bathroom medicine cabinet, or you kids' sock drawers) can go a long way in boosting your organizing self-confidence. Once you get the small things under your belt, you are ready to tackle a bigger project (more tips on how to do that will follow, and see previous post about list-making!) Try to finish one room or area before moving on to something else. Leaving a task half-done can be discouraging, and it can just add to the clutter and mess around you. And remember, Don't Stress. A home should be a calm and inviting place, and getting things organized can do wonders for how you feel about yourself and your home!

Thursday, August 12, 2010

Vinyl Reprise

So, I had someone ask me how I made the vinyl letters in my last post, so I thought I'd give you a quick run-down! I used vinyl given to me by a friend that works at a sign shop, and I cut out the letters on my Cricut Expression. Since the letters were for my boys' doors, I let my 3-year-old pick out the characters. I used the Plantin SchoolBook font and made 5-1/2 inch letters, a 3-inch dinosaur, and 2- and 3-inch sail boats. On his brother's door I used 6-inch letters and 2-inch characters. This particular vinyl was a little bit tricky to put on straight (especially the W) because it tends to stretch when pulled. The good news, thought, is that it comes off the wall/door and re-sticks very cleanly. I was able to adjust them as I went along to make sure I got a straight line. (I have not tried the vinyl that Cricut makes, so I can't really compare it to what I am have now.) If you are interested in vinyl lettering but you do not have a Cricut or other cutting machine, there are several websites like this one or this one (my favorite) that allow you to customize and purchase cut-outs for your walls.
Hope this was informative, happy vinyl-ing!

Wednesday, August 11, 2010

Vinyl!!

So I have recently taken an interest in vinyl lettering. We want to do a little painting around the house before I put up anything major on the walls, but I wanted to share (for those who haven't seen it yet) some of the things I have started with. I got some scraps of vinyl from a friend (thanks Brittany!), and I made letters for my boys' doors. I think they turned out pretty cute!


Tuesday, August 10, 2010

Wipe Case Cover

I wanted to post something super cute, yet also pretty simple, for those who are not savvy at sewing (such as I). One of my favorite blogs, here, always has great crafting ideas and tutorials. This is one that I am going to try as soon as we move into our new home, and I redecorate little A's nursery/toddler room. The tutorial can be found here.


Looks pretty easy, huh?


Monday, August 9, 2010

Small Beginnings

OK, here goes! Ever since we decided to start blogging our ideas, I have been making a mental list of things I wanted to post about. Then it occurred to me that making lists is a very good place to start when it comes to getting organized. I could not live without my lists! When I wake up in the morning and know that I have a lot to do that day, I head downstairs and make a list of what needs to get done. As I go through the day, I cross things off the list as I get them done, and I add to the list as I notice more things I'd like to do. The same principle can be applied to tackling a cluttered room or closet, or any area of your home or office! So, here's how to make a list work:

1. Grab a pen and paper and walk around the room/area. Write down everything: things to be put away, sorted through, boxed up, dusted, cleaned, rearranged, washed, ironed, thrown away, or given to Goodwill.
2. Don't go in order. Some of the first things you write down may not be the easiest to accomplish. Start with what's most obvious and what can be done quickly and work your way up to the more time-consuming stuff.
3. Cross things off as soon as you finish! Seeing things crossed off a list can be very satisfying!
4. It doesn't have to all get done in one day! As long as you have your list, you'll never lose your place or forget what you've already done!

Check out this website for some list-making ideas!

Sunday, August 8, 2010

Welcome!

Hello everyone, and welcome to our blog! We are Melissa and Jennifer, sisters-in-law and good friends, and we are starting this blog as a way to share our adventures in the worlds of crafting and organizing. We hope that as we share some of what we create and what we have learned that some of our ideas and tips will be entertaining and helpful, and that you will come visit us often for new ideas and updates. Feel free to Follow us! :)